You have no items in your cart. Want to get some nice things?
Digitally painting a caricature, comic or cartoon becomes a simple task on computer.
Learn simple how to steps to paint your character drawings on Photoshop.

The Steps for Painting A Caricature
The last video/blog I did, showed you how to “Paint A Line On Computer”, using a caricature drawing of myself. This video/blog reveals how painting a caricature, comic or cartoon with that line on top of it can be done.
-
Import Drawing
First, do a line drawing or import the drawing you want for character painting.
Follow the steps in the video/blog mentioned above for painting the line. Make sure the line is its own layer.

-
Duplicate Drawing
I begin by duplicating my line. Command (Mac) or Control (PC) J. This gives a line layer above (for finished covering), with one below (a painting guide).
-
Create A New Layer
Click on the copy symbol at the bottom right corner of Photoshop to create a new layer. You will paint on this new layer between the lines.
Start with Flat Colors
-
Flat Color
- When painting a caricature begin with a flat basic color for every section. I did this on my face, my shirt, my glasses etc.
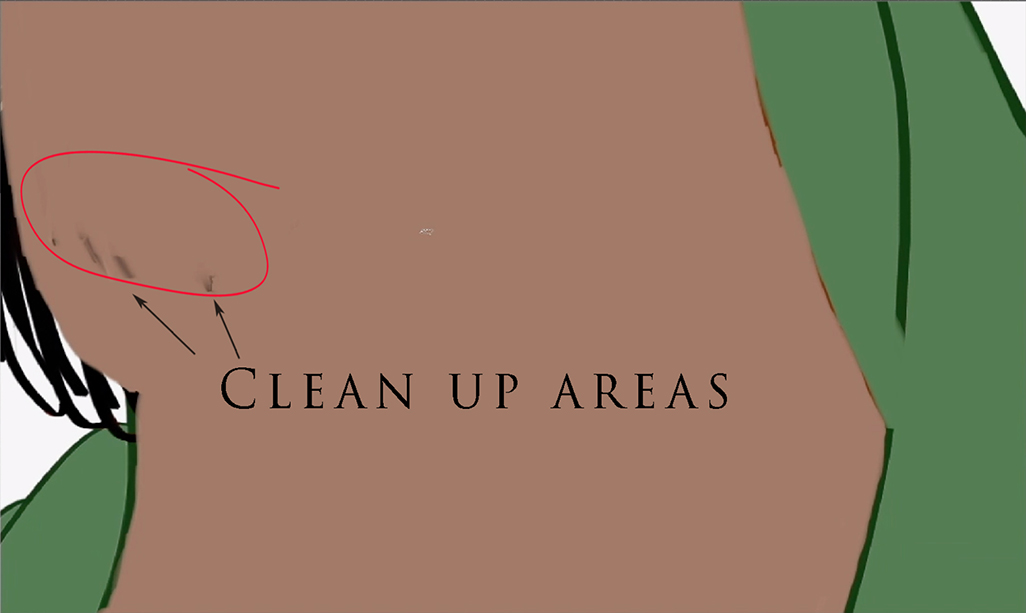
- Of course I clean up should I go outside the line. I then make adjustments in the tone of my color as I go.

- When I start painting my shirt, as a way to speed painting it, I put a marquee around the line which helps me isolate the shirt off and allow me to go through it quicker. The marquee prevents me from painting directly on the line therefore I’ll need to go back and paint in missed areas under the line.
- I do the same for my glasses and my eyes. Then clean up underneath the marquee line there as well.
- When I finish cleaning up, I work on some hair textures that I drew in. I paint in a solid color for the hair. Then do a transparency percentage which will allow hair texture to show through from the layer beneath it.
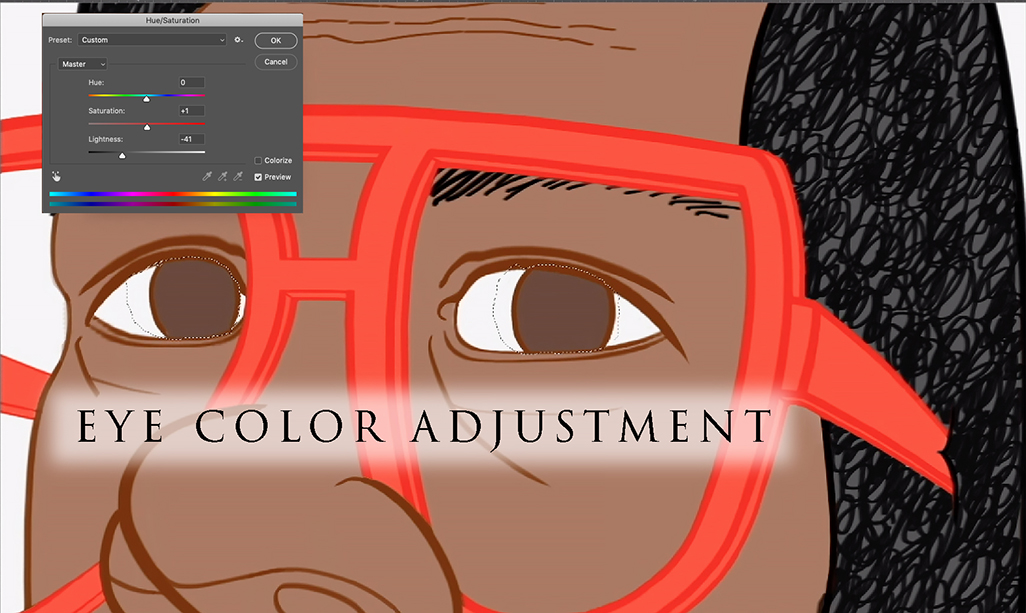
- I isolate my eye color with the marquee tool in order to make an adjustment, using the hue saturation color slider.
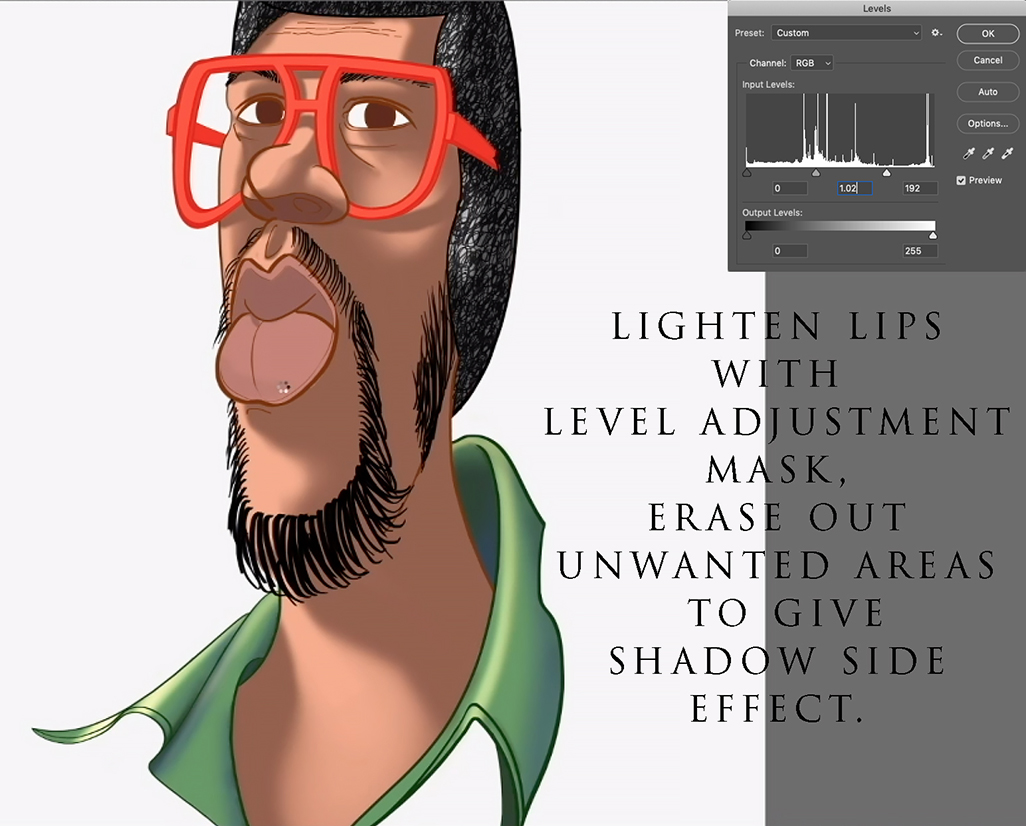
- I do the same thing on my lips making an adjustment using hue saturation. Then clean up afterwards.
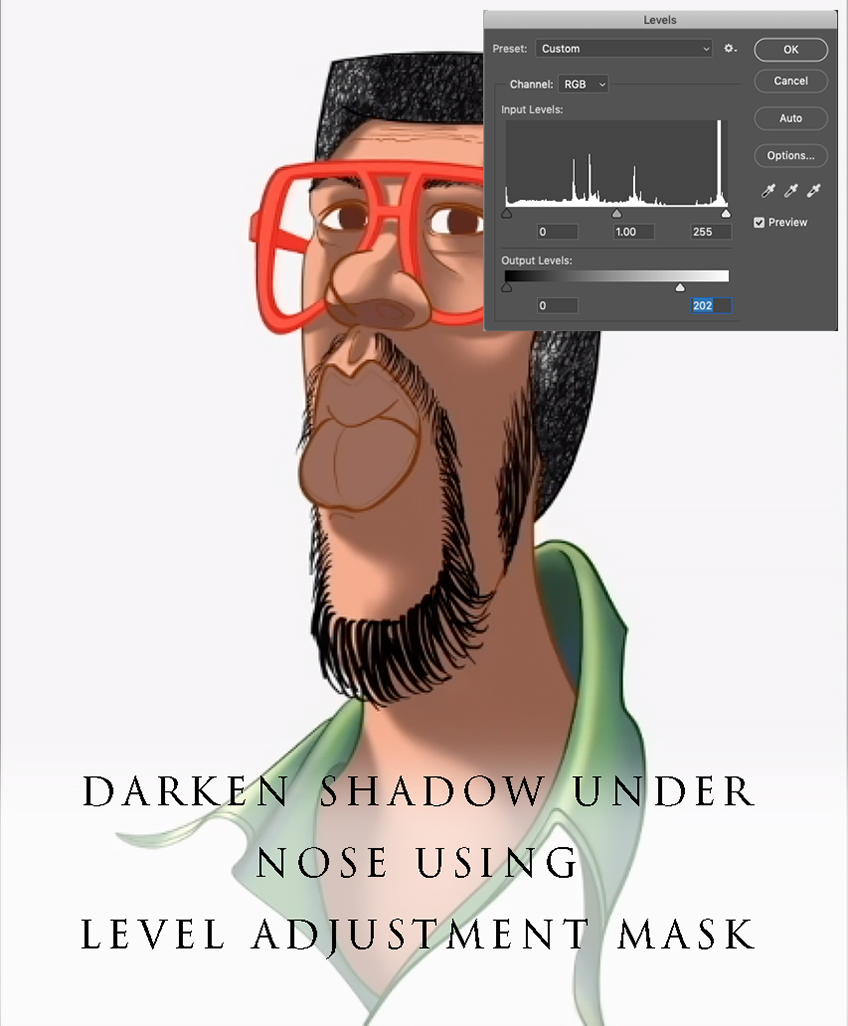
- I repeat the same procedure to give a shadow under my nose using only flat color for the time being.

- Now I add flat color in the shadow areas of my shirt.
Dimensional Rending
From here I start doing dimensional rending with an airbrush approach when painting a caricature.
-
Determine Light Direction
- I decided to have light coming from the left going toward the right which will cast a shadow on the right side of everything. It’s always important to know direction your light is coming from.
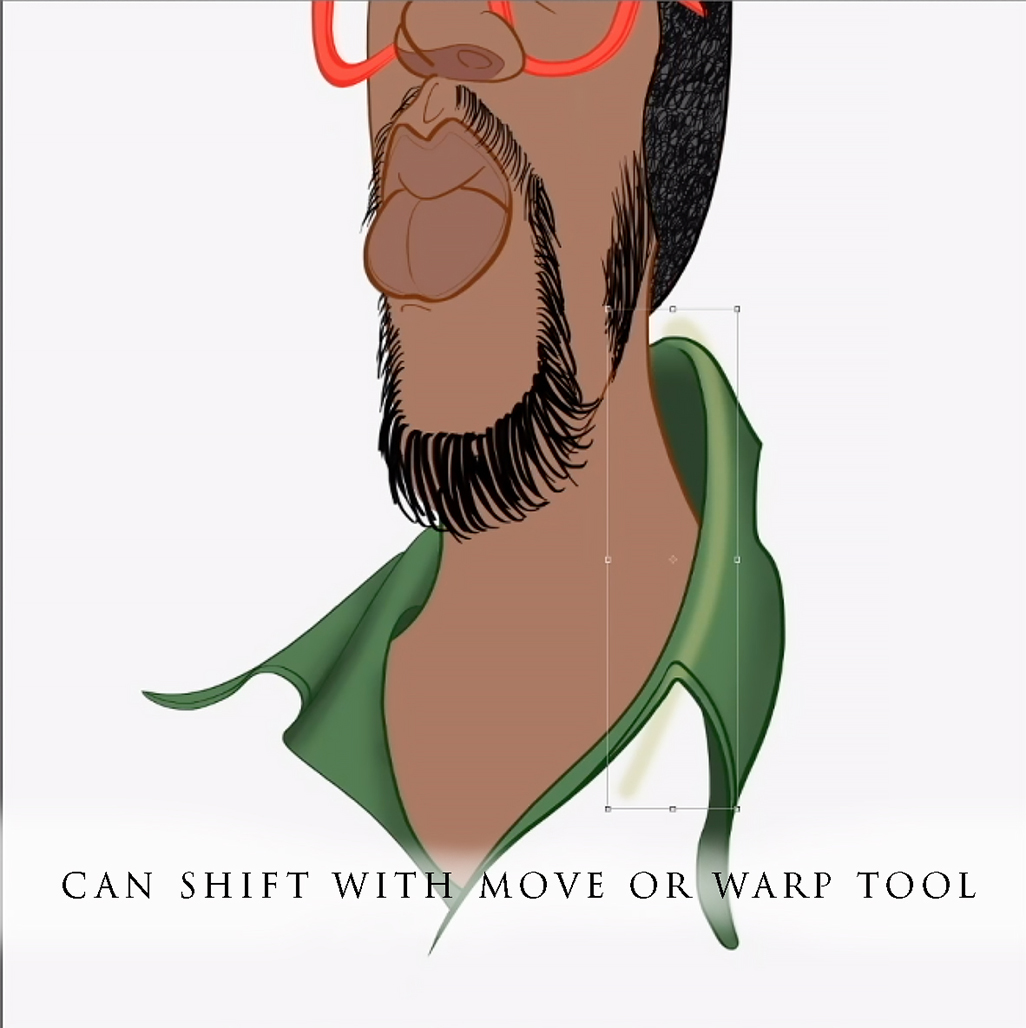
- The fun of painting with computer is that as I paint in some light areas, I shift them if they are not exactly in the shape or place I wanted them to be. Using the move or the warp tool helps with that. I brighten the area up some with adjustment sliders or color shifts on my shirt if it needs. I decided to cool down the shirt color a bit adding a slight blue touch.
- Then clean up my glasses and give a shadow side to it.
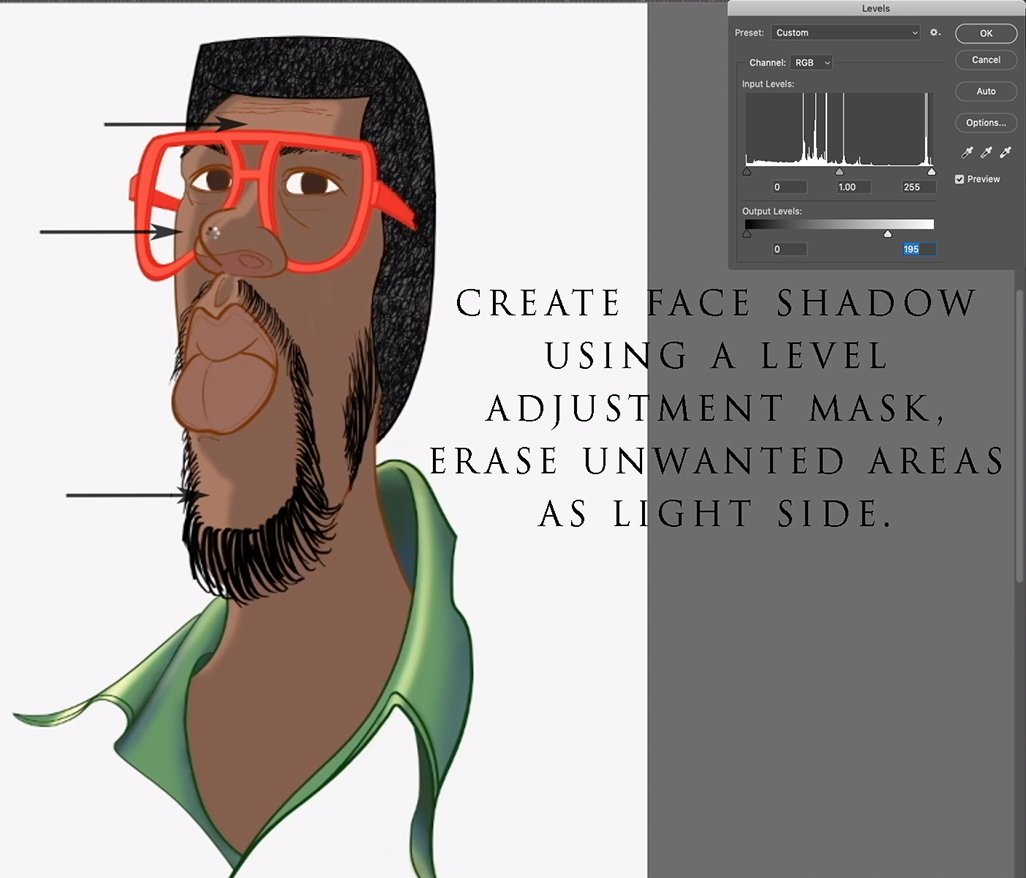
- For my face shadowing I created a darker “Layer Adjustment Mask”, then erase out unwanted areas. I shift the colors a little bit and brighten it up so it has a strong sense of light and shadow.
- I do a “Layers Mask” for my hair and I brighten it up and erase out the unwanted so it looks like light is hitting my hair, and there’s a shadow side.
- I decided to give more shadowing under my nose. Now I’ll work on my lips to give a light and shadow side to that as well with a shift in color.
- Then I’ll have the few spots to clean up, a few mistakes I haven’t seen before, shifting my face color some.
- This is where I paint in the nostrils. I’ll add a little more detail to my lips. Bring out some highlights. It’s amazing to me how highlights add more dimensionality.
- Now I give a light area to my beard and mustache. First, marquee it off, then paint in light spots.
- I will give highlights to my glasses making the line straight across and using the “Warp Tool” to put it in place. Marquee it off to make it easier to paint in other highlights.
One of the things I like doing is giving reflective light because it gives more dimensionality and extra color interest.
- In this case I’m using cooler reflective light because my face is overall warm so it make for a good visual balance when painting a caricature.

- My glasses needed a darker area on the arm to push back one portion of it.
- Now I’m working on my eyes, I’ll give myself a pupil, erase some of that out. I’ll put some Shadowing on my iris trying to give it some dimensions. Then give some shadow to the white part of the eyes then clean them up. Now I’m giving myself a lip to the lower eyelid giving dimensionality. Putting some highlights to the eye. Checking things that I may need to clean up. Darken the upper eyelids a little more.

- Put a shadowing on my wrinkle lines, not too heavy, and then a light side to my wrinkles. Soften some of that edge a little bit.
- Putting a little more shadow under my nose for dimensionality as well as on my lips. Some shadow on my glasses. Adding a little more shadow to my nose to feel more anchor to my face.
- I painted a background card for the finished look. Below is the completed character.
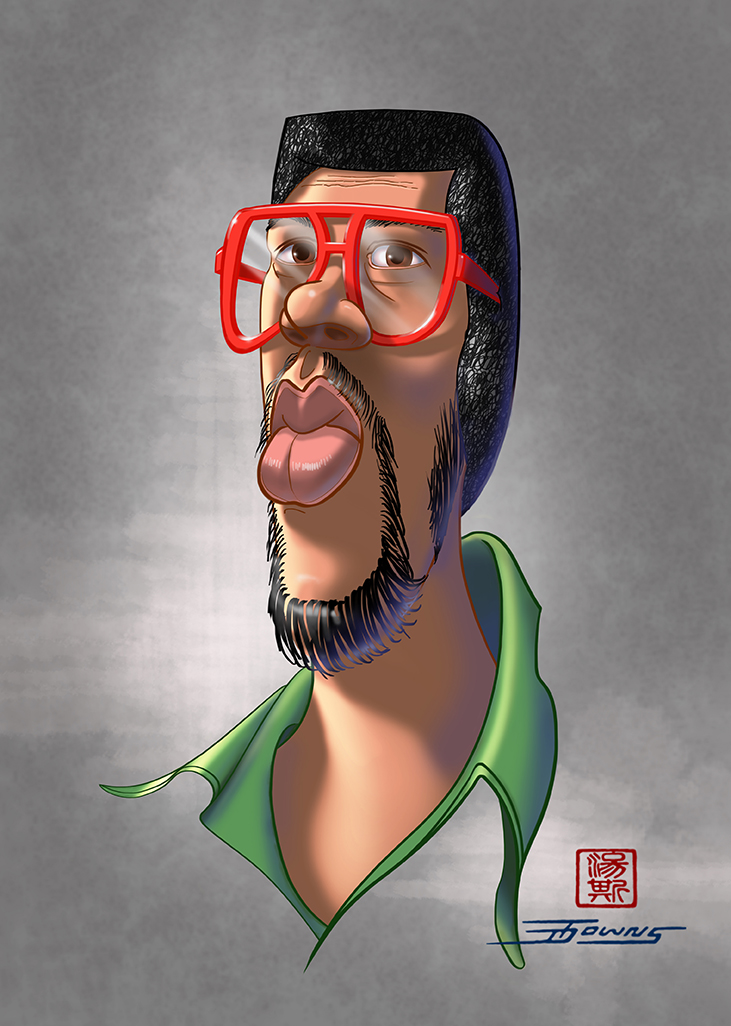
Hope that was helpful! Give it a try, and let me know how it turns out!
You may find “Painting with Photoshop On Computer” and “How To Paint Digitally With Photoshop” helpful with related details to this blog/video.